Showing posts with label uncategorized. Show all posts

Wednesday, 4 February 2015

LFW AW13 Fashion Scout: Krystof Strozyna & Ekaterina Kuhkareva

I know it's three weeks since London Fashion Week and I have been slack in writing about all the shows I've attended.  An unexpected surprise of the LFW saga was the invite to some Fashion Scout shows. I knew very little about the designers whose shows I was invited to but that just made the experience more interesting. I'm going to play lazy and rather than writing reams about the show, I will share my favourite looks from Krystof Strozyna  and Ekaterina Kuhkareva. All photos via Vogue online as mine were just not good enough.


One way to my heart is definitely through my tummy. The Krystof Strozyna show got off to a good start with servings of delicious frozen yogurt and champagne. The collection itself contained a mixture of streamlined greys and teals and minimalist shapes. Whilst interesting, it was not colourful or quirky to make me want to run to shops and buy it all. 


The Ekaterina Kuhkareva show on the other hand was a different affair. Whilst the I didn't quite 'get' the show notes about idle housewives dreaming of more exciting times, I did like the collection. It was full of colouful knits and sheath maxi dresses. I also loved the rollers inspired glittery headgear and the fab doorknocker earrings. Shame there was no frozen yogurt or champagne!

Hope you are having a lovely weekend. Ann x


Tuesday, 3 February 2015

Meet Tamara of Tamara Tobias


I've been meaning to start an interview series on the blog for a while now and I am both pleased and  honoured to have the lovely London scarf designer Tamara Fowler for the very first one. Tamara graduated with a degree in fashion design from Central Saint Martins and has since worked with some of the best talent in the industry. The Tamara Tobias brand is all about luxurious textures and stunning prints. Her hydrangea and bouquet scarves in particular had me in complete swoon mode. To get know the brains behind these truly stunning creations, I had a little virtual chit chat with Tamara. Read it all here....

I'd love to know what inspired you to start your gorgeous boutique..
Passion for print and design and my own love of accessories is what inspired me to start Tamara Tobias. I always knew that I wanted to run my own successful business that stood out in the market and provide other women with joy and a sense of luxury. Being a devoted scarf fan myself, I felt that this interest was where I wanted to build a brand from and showcase my designs online to a wide network of equally keen scarf fans!

Where do you get your style inspiration from?
Everywhere! My inspiration for our first collection came from photographs that I had taken in so many places. I am always inspired by beautiful things that can range from simple, everyday objects to wonderful, unique finds that I believe will end up looking amazing when printed digitally onto any fabric. 

Which are your favourite pieces from your collection?
My favourite pieces are the 'Bouquet' scarf, as this design was inspired by my own wedding bouquet and therefore always brings back very happy memories for me when I wear it or see someone else wearing it and I also love the 'Hydrangea' scarf, as it fun and bold and looks great in the sunshine!

If you were to give the readers of 'A Quirky Lifestyle' one piece of style advice, what would that be??
As all good style-savvy individuals know, scarves complete an outfit and are the ‘must – have’ accessory for feeling fabulous.
Tamara Tobias scarves are available on her website and come in a  variety of fabrics ranging from 100% silk to cashmere mix with prices ranging from £60-£120. So, if you are looking for that extra oomph in your wardrobe or just a bit loveliness in your life, you should definitely check out a Tamara Tobias creation. They are blooming gorgeous! 
Have a lovely weekend you guys! Ann x

To get in touch and see the latest on all my adventures, follow me on Bloglovin, Twitter or Facebook .

Gyoza Anyone?


'What else can I cook with bloody cabbage?!' I thought the other day. As I sat on the bed watching TV whilst doing mental arithmetic of the various veg and how to store/cook/freeze them, I chanced upon a Jamie Oliver show. Jamie was making a Japanese favourite of Chinese origin, Gyoza. I found my solution to the cabbage conundrum! The recipe was simple enough.  And I could either make the gyoza wrapper myself or find some. I cheated and chose the latter. Our local Chinese shop stocks most asian food items and it only cost me a pound something. Here is how I made the gyoza.
I shredded a cabbage and chopped an onion and fried them in a bit of olive oil. To add my own twist, I mixed some dessicated coconut to the frying mix. I fried the mix for about 10 mins and the added it to a bowl of 500g pork mince. I mixed all the ingredients by hand and took it back to the pan for frying. I believe the traditional recipe does not require the pork to be cooked in advance but I did not fancy that method.
Once cooled, I spread a spoonful of the mix into a gyoza wrapper, crimped the edges of the wrapper and set aside. Once I had a batch of these dumplings I placed them in a saucepan and fried them for a few times before adding 1/4 cup of boiling water, closing the lid and letting the dumplings steam. The result is a dumpling that has a crunchy bottom but is soft on the inside.
To make a dipping sauce, mix soya sauce and chili oil in equal measure and serve. Douzo meshiagare = enjoy your meal! Ann x

Lets Get Macaronning!


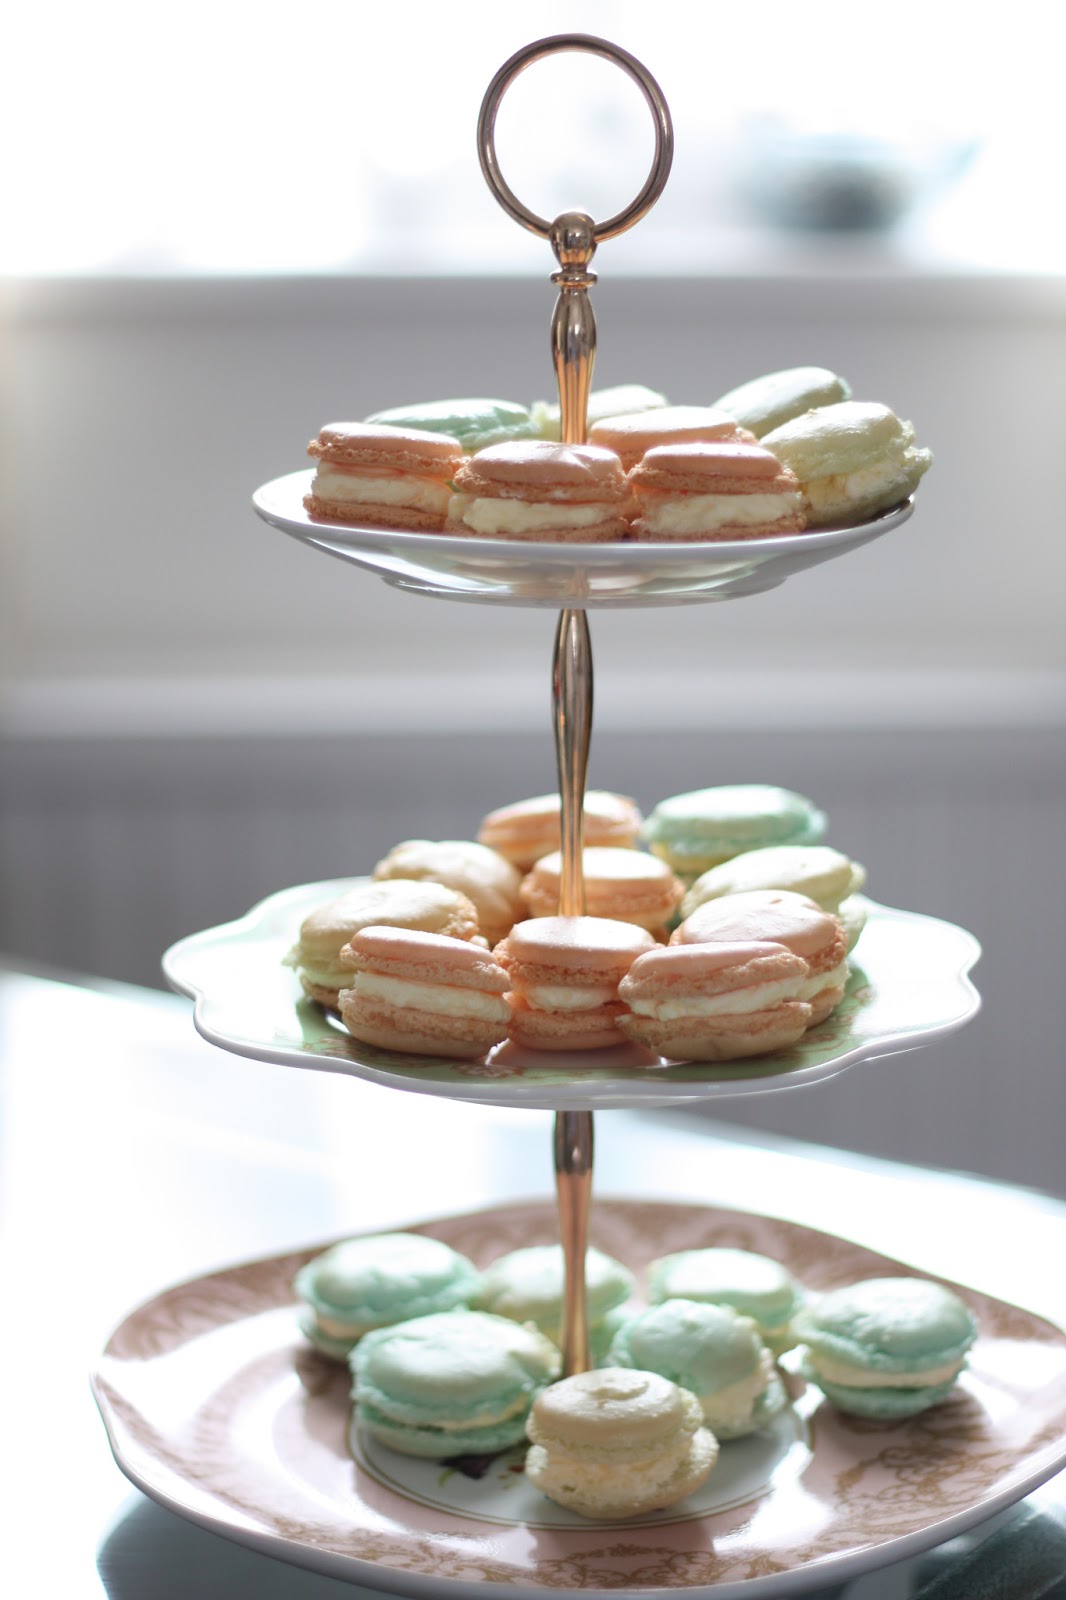
Do you remember my first attempt at macarons catalogued through my ex-blog Made by Ann ? They were far from perfect and had cracked surfaces but still tasted lovely. I learnt a few things from that experience including the importance of getting the temperature spot on. More recently, I attended a Bloggers Buzz event where Dora from BoBo Macarons gave us a demo on macaron making. Dora taught us three things essential to making perfect macarons 1) egg whites aged for a few days 2) time in the oven and temperature 3) the importance of being in a good mood. Watching Dora's technique taught me more than any recipe book and I was looking forward to giving macaron making a go again.


Here is the recipe I used. I must add that this is slightly different to the one Dora used, partly because I wasn't sure my notes were quite right.

For the macarons:
150g almond powder
210g icing sugar
90g caster sugar
3 large egg whites
Gel food colouring . I used hot pink, sky blue and lime green

For the butter cream icing:
150g unsalted butter
75g icing sugar
1 tsp vanilla extract
 

Method:

Heat the oven to 150C. I use a fan heated oven. If you use gas, you may need to reduce the temperature a little bit. Recipes recommend around150-160 for fan oven and 140-150 for gas ovens. You need to test a batch and figure out what works best for you.

Sieve the almond powder and icing sugar together and mix well. In a separate bowl, whisk the egg whites and slowly add the caster sugar until the mixture is thick and shiny. (It is recommended that you add food colour to the egg white meringue mixture. However, I chose to do it later after all the ingredients were mixed together) Mix the almond and meringue mixture well until it smooth, glossy and flows smoothly off the spatula.

I then separated the mixture into three parts and added a few drops of gel food colour. I was aiming for a pastel shade. The colour of the mixture and the end product were near enough similar,  point worth noting as I assumed it would darken significantly.

Pipe out the macarons onto a parchment paper on a baking tray and rest them for about 15 minutes until they have firm skins. Bake for about 15 minutes or until the macarons look ready. Leave them to cool for about 30 minutes.

For the butter-cream icing, whisk the butter and icing sugar together until thick and creamy. Add flavouring of your choice whilst whisking. I used vanilla extract.

Once the macarons have cooled, sandwich them together with butter cream icing and they are ready to serve.

Lessons:
1. Cooking or baking on your own isn't that much fun. My husband was a willing Sous Chef who helped with sieving, piping etc. It often felt like some of the tasks were more efficient if two people did it rather than one. So find a friend or partner to make your macaronning experience more fun. ( Ed may not think it was that much fun to be fair as I was a stress-pot)
2. Don't rest the mixture too long before piping. The second batch I piped out were a disaster. Then again, the third weren't too bad which is puzzling!
3. Don't over bake as the macarons start browning. A lesson I learnt with my third batch. Keep an eye on he clock and the progress on the macaron.

Let me know how you get  on with macaronning. Ann x

To get in touch and see the latest on all my adventures, follow me on Bloglovin, Twitter or Facebook .

More Homemade Chocolate

Monday, 2 February 2015

Haggis for Auld Land Syne


Visiting Edinburgh was one of the first touristy things I did when I landed in the UK many moons ago. I instantly fell in love with the city, its people and music. I remember visiting little pubs with friends and joining in with the crowds singing cheeky Scottish folk songs. I've always been adventurous with food and despite being persuaded otherwise, I wanted to try the haggis. It is a shame I can't remember the restaurant where I had my first haggis, neeps and tatties but there was nothing 'iffy' about it . It was beautifully presented and delicious. This is my attempt at re-creating that first encounter with the haggis using root vegetables from our allotment.


Ingredients
1 kg haggis
250g  parsnips (traditional recipe uses swede/turnip) cubed
400g potatoes, cubed
100ml milk
250ml gravy

Method
Follow instructions with the pack for the haggis. I microwaved mine for 5 mins on full heat. You could also cook in the oven or simmer with a little water. Slice the parsnips and beetroot into wafer strips, season as desired (in this case the beetroot was seasoned with chilli and beetroot with rosemary)  and bake for 20 mins. Boil the potatoes in a pan of salted water, reduce the heat and simmer until tender.  Drain the potatoes, return to the pan, add the milk and mash until smooth. Layer as shown in the picture and serve with gravy. Hope you have a Happy Hogmanay! Ann x


How to make gluten- and dairy-free banana bread

By Rebecca Almond


Here at HFG we love to tinker with recipes, both in the test kitchen and in our own homes – swapping out less healthy ingredients for nutrient-rich and allergy-or-intolerance-friendly alternatives. So when a friend with coeliac disease invited me to her new flat for coffee, I set about searching for a sweet treat I could bake to take along – one that everyone would enjoy.


Banana bread is a classic coffee break snack, and one that’s simple to make. Cookery books and recipe websites are filled with variations on the theme, but many are high in calories and contain gluten. For me, bananas are sweet enough, so I decided to leave out the usual maple syrup/sugar/agave nectar component. And to make the loaf gluten-free, I put the coconut flour I’d picked up at a health food store a few weeks ago (clueless as to what to do with it) to the test.

The result? A moist, subtly-sweet loaf that’s low in calories (only 117kcal per slice!), high in fibre and protein, and, crucially, something all of my friends and I happily tucked in to. Give it a go yourself and let me know how you get on…


Coconut, chia and banana loaf
PREP 10 min + resting COOK 40–50 min CUTS INTO 10 slices


3 ripe bananas (you want the skins to be nicely speckled)
6 eggs
1tsp vanilla bean paste
½tsp ground cinnamon
2tsp gluten-free baking powder
70g coconut flour (I used Sukrin)
20g chia seeds
Desiccated coconut, to sprinkle (optional)

1.     Put the bananas, eggs, vanilla bean paste, cinnamon and baking powder in a blender and whiz until smooth (the mixture will be quite runny, like a smoothie). 


2.     Sift the coconut flour into a large bowl, then stir through the chia seeds. Slowly pour in the banana mixture, whisking with a balloon whisk until thickened and combined. Cover and set aside for 10 min to allow the flour and chia to expand. Heat the oven to 170C/fan 150C/gas 3½ and line a 1lb loaf tin with baking paper. 


3.     Pour the cake batter into the prepared tin, then smooth the surface with a spatula. Decorate the top with a sprinkling of desiccated coconut, if you like (you could use sliced banana or chopped nuts, or leave plain – it’s just as delicious), then bake on the middle shelf of the oven for 40–50 min until golden and an inserted skewer comes out clean. If the top looks like it’s browning too quickly, cover loosely with foil. 


4.     Remove the loaf from the oven and leave to cool for 5 min before turning out on to a wire rack to cool completely. The loaf will keep, well wrapped, in the fridge for up to a week – if you can make it last that long…

SERVING SUGGESTIONS: A slice of this loaf is perfect as it is, but you could top with a drizzle of runny honey, natural seed butter or a little ricotta cheese, if you like.

Per slice
117kcal
6.6g protein
5.6g fat
2g saturates
9g carbs
7.1g sugar
4.7g fibre
0.4g salt
47mg calcium
1.2mg iron

LOW CAL
HIGH PROTEIN
HIGH FIBRE
VEG
GLUTEN FREE
DAIRY FREE

Rachel Khoo Inspired Croque Madame


Despite our not-so-perfect weekend in Paris, I'm having a case of Paris blues. I seem to be reading up more about the city, as well as all things succumbing to all things inspired by it. Rather fortuitously, Ed and I also happened to watch Rachel Khoo's 'The Little Paris Kitchen' last night. Ed loved version of Croque Madame Muffins and was keen I recreate it for him. And I did, except for a few touches of my own and using whatever was readily available in our kitchen.


Serves 4

Ingredients:

For the base:
4 slices of wholemeal bread with crusts removed
4 eggs
8 slices of prosciutto
Around a dozen french beans, blanched and halved
Butter
Salt and pepper to taste

For the bechamel sauce:
1 tbsp plain flour
1 tbsp butter
1tsp English mustard with chilli ( Rachel uses Dijon mustard)
150ml semi-skimmed milk


Heat the oven to 180 degree and make the bechamel sauce.

Bechamel Sauce:
Melt butter in a saucepan. Add flour and mix well to form a paste. Whilst simmering on a low heat, slowly add milk and stir well. Add mustard paste and continue to stir. The sauce will thicken in a few minutes. Once it start getting to a thicker sauce-like consistency, take it off the heat and allow it to cool for a few minutes.


Grease the ramekin base and sides well. Flatten the bread slices using a rolling pin, butter both sides and layer one slice per ramekin.Add two slices of prosciutto on top of the bread. Crack an egg onto the prosciutto layer. Surround with a few pieces of french bean- I used around 6 per ramekin. Pour bechamel sauce on top covering the egg fully.


Bake for around 15-20 minutes until the tops of the Croque Madame Muffins start to brown a little. This makes a great breakfast dish although Ed and I had it for dinner to compensate for a heavy meal during the day. It also makes a good mid-day snack.

A big thank you to Rachel for her great ideas and I hope you get a bit more of Paris through this recipe. Ann x


To get in touch and see the latest on all my adventures, follow me on Bloglovin, Twitter or Facebook .
Photography by Edward Chandler

Get all your five-a-day in one dish!


By Harry Eastwood

This salad is a deconstructed version of ratatouille, which makes for a delicious, fresh and full-flavoured alternative to the traditional vegetable stew. It can be made ahead – and, in fact, tastes even better. It ticks plenty of health boxes as it’s high in fibre and low in calories, fat, saturated fat, sugar and salt. Most people can enjoy it, as it’s vegetarian, gluten-free and dairy-free. And the best thing about it? One serving counts as a full five portions of your five-a-day.

Ratatouille salad with anchovies and lemon

Serves 4

1 large aubergine, cut into small cubes
2 medium courgettes, topped, tailed and cut into very small cubes
4tbsp olive oil
1 large Spanish onion, peeled and finely diced
1 medium yellow pepper, cored and chopped into small cubes
1 medium orange pepper, cored and chopped into small cubes
2 garlic cloves, crushed to a paste
3 anchovies, very finely chopped
10 medium ripe tomatoes on the vine
Freshly squeezed juice of ½ lemon
Handful of basil leaves, torn from the stem

1. Heat a large frying pan until very hot.

2. Toss the aubergine and courgette cubes in the olive oil until evenly coated. Add them to the hot frying pan and cook over a high heat for 5 min, until the edges have turned a golden colour. You may find that you need to do this stage in two batches.

3. Tip the hot vegetables into a large bowl with the onion, peppers, garlic and anchovies. Season generously with pepper, then cover with clingfilm. Set aside for 10 min, while you prepare the tomatoes.

4. Chop the tomatoes in half and scoop out the seeds and centre with the help of a spoon. Finely chop the flesh, then add to the bowl with the rest of the ingredients.

5. Finally, squeeze the lemon juice over the salad. Set aside (wrapped in clingfilm) for 1 hr in the ambient temperature of your kitchen to let the flavours mingle and develop. Scatter the basil leaves over just before serving and add more pepper if needed. Serve with crusty bread, if you like.

SWAP IN/SWAP OUT
I love the savoury flavour the anchovies bring, but you don’t have to add them – this ratatouille is delicious without. You could include pine nuts if you want the salad to be a little more hearty and reduced-fat feta or mozzarella chunks are lovely thrown in at the last minute, too.

Per serving: 210kcal, 6g protein, 12.8g fat, 2g saturates, 19.2g carbs, 17.1g sugar, 9g fibre, 0.3g salt, 77mg calcium, 2.7mg iron

 
Harry’s supporting our mission to Fight the Fads – Make Every Meal Healthier. To find out why she’s rallying against the fad diet industry, pick up our October issue.

For more substantial salad recipes, check out Harry Eastwood’s A Salad For All Seasons (Bantam Press, £20).

Sunday, 1 February 2015

DIY Flower Embellished Sunglasses


I'd been lusting after statement sunglasses of late, partly due to inspiration from the catwalk. I trawled through sites like Asos and Etsy and found some fabulous shades out there. However, it also inspired me to investigate a little DIY project. I found an eBay shop that sold resin flower cabochons which were perfect for what I was planning. The H&M sale yielded a couple of great pair of  shades. All I needed was some superglue and a toothpick and I was all set to create a lovely pair of floral shades .


To make a pair yourself, you will need the following:
A pair of sunglasses ( an old pair or a sale find should work well)
A small tube of superglue
A toothpick for positioning the flowers
An assorted set of resin flower cabochons


To embellish your shades, plan how you would like to style it and lay it out accordingly for gluing. Apply a small amount of glue to the base of the flowers and stick them on the sunglasses. It will take a minute for the glue to set properly. Once you've glued all the flowers and let it set for about ten minutes, you are good to go.  So easy!

Let me know how you get on with your DIY project. Ann x


Afternoon Walks and Ethical Fashion

Sunny days in the UK are to be treasured. More so as we head towards winter. Today was lovely and  sunny so hubby and I decided to go for a little walk near where we live. It was also great light to photograph/share some of my treasured ethical fashion buys. Ethical fashion may mean different things to different people. In essence it involves a sustainable attitude towards fashion related consumption. I'm a huge fan of charity shops, thrift stores and eBay. Recycled does not have to mean tired or grubby at all. I've made some great purchases at charity shops but two are my best buys are captured in the pictures below.

This red Morgan De Toi coat which retails at well over a £150 cost me only £6.50 at the Salvation Army!! I spent another tenner dry cleaning it but it is still lovely yet so cheap. The leather boots are Clarks and retail at nearly £100 and cost me £4.50 at Oxfam! I bought the coat just a few weeks ago but the boots have lasted me 5 years already, second-hand! The scarf is 100% silk, possibly vintage and cost a couple of quid.  So before you think of buying another fashion item (or anything else for that matter), why not check out your local charity shops first. Every little makes a difference and it makes indulging in fashion a lot less frivolous.  Ann x

P.S.: Watch this space for some more posts where I'll share some of my ethical fashion outfits


Photography by Edward Chandler


January Etsy Favourites!


January is often a time for new starts and I have one little new feature for the blog. I recently became an Etsy affiliate which is quite exciting! It sits well with my ethos of promoting local designers, handmade and vintage. With that I've decided to regularly share a selection of handpicked favourites every month that I hope will interest my readers.  This month I've been mainly decluttering and organising for our big move to Edinburgh. I've also been dreaming to bright colours, sparkly jewels and quirky touches for our new home. Unsurprisingly, Etsy has some gorgeous offerings.

Quirky cushions:  If Lulu Guinness feels a bit out of reach but lip smacking curious still get you excited, this beautiful cushion (a steal for £18!)  may be just what you are after.

Hand carved bookshelves: I love my books and am always on the lookout for unique bookshelves. Benjanim's Barn has some truly beautiful pieces that look like they will last a lifetime and still remain  stylish.

Eco friendly storage: As part of our move, we are decluttering, downsizing and organising our lives. It is very liberating. That said, these eco friendly storage units look like a very useful for keeping life organised whilst enabling mobility. And, they are so very cool too!

Funky art: Just because we are moving/decluttering doesn't mean we are going all bland. I love having art and colour around our house and this little framed piece is on my wish list for a our new home!

Ceramic plant pots: I am going to miss our garden and allotment but it doesn't mean I'll stop gardening altogether. There are plenty of options for playing green-thumbs indoors and these ceramic pots make a rather stylish affair.

Dressing up: This whole business of moving many hundred miles is a rather stressful affair to say the last. I figured little indulgences like these Jennifer Loiselle earrings or this bright vintage peter pan collar dress would make life a lot happier!

What do you make of my Etsy list? Which are your favourites? Ann x

To get in touch and see the latest on all my adventures, follow me on Bloglovin, Twitter or Facebook.

Saturday, 31 January 2015

Easy Avocado Ice cream Recipe


A couple of weeks ago I tweeted my desire to make avocado ice-cream with edible flowers. I finally got to make it this week and the result was absolutely divine, even if I say so myself. Here is how I made it.


Ingredients:
4 avocados
300ml whole milk
150g caster sugar
1 vanilla pod
Juice of 1 lime or 4 tbsp bottled lime juice

Method:
Chop the avocados and blend them into a fine paste, adding 150 ml milk. In a saucepan add the sugar, lime juice and vanilla pod and bring to a boil. Cool the mixture and remove the vanilla pod. Add the sugar mixture to the avocado puree in a large bowl. Now Add the remaining milk. Freeze the mix in an airtight box. Whisk with a blender or fork every few hours to ensure a smooth consistency and to reduce crystallisation. The ice cream is ready to eat as soon as it is frozen. It takes less than 30 mins to prepare and a few hours to set. Alternatively, use an ice-cream maker for more instantaneous results.

Note: Before you freeze the mixture, taste to see if you are happy with the flavour. Adding some extra lime juice/ sugar mixture increases the depth of flavour and you may choose to do so.


Whilst my original idea was to add chocolate or edible flowers, the ice-cream is best served without anything else.

Let me know how you get on making the ice cream. Ann x

Friday, 30 January 2015

Rethink your drink

By Emer Delaney, British Dietetic Association spokesperson 

We all know that giving children fizzy drinks is never a great idea because they are high in sugar and have very little nutrients. Some contain the equivalent of eight heaped teaspoons of sugar, which can not only contribute to weight gain as they don't make your child feel full, but can also damage their teeth. And now health experts have calculated there's even more sugar in some smoothies and health drinks. While there are no recommendations on the number of sugary drinks that are allowed, parents should limit them as best they can.


Research has shown that children aged four to ten years get 16% of their sugar intake from soft and fizzy drinks and soft drinks were the largest contributor to sugar intake for children aged four to eighteen years.  These are frightening figures because when kids drink too much juice, juice or sport drinks their intake of milk declines and they get too little calcium for their growing teeth and bones.

Whether its fruit juice or fizzy drinks, the source of the sugar doesn't matter as any sugar the body doesn't need will be converted to fat. Also, when children have these drinks on an empty stomach, the body takes in sugar so quickly, insulin spikes and then drops suddenly, leaving them feeling hungry.   50% of UK children are now overweight so limiting these drinks is more important than ever.

So what can parents do? Limit the drinks for special occasions only like parties or holidays; dilute fruit juices with water; try flavoured water or de-caffeinated tea for a change. But the easiest and clearest message for all - milk or water should be a child's only choice.

We need to empower our children to make their own decisions and to teach them that too many fizzy drinks, fruit juice or sweet drinks are bad for their bodies. Change doesn't happen overnight, but we can start making small steps today and make it happen today.